How To Create A Landing Page In GetResponse
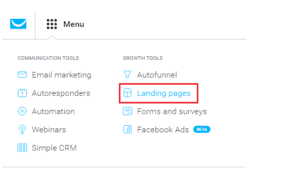
How to create a landing page in GetResponse, go to the menu and then landing pages section on your dashboard. Press the blue button, Create Landing Page. Choose from build from scratch or from the hundreds of templates GetResopnse have at your use. Choose Sign-Up and Registration for example and start editing the landing page.
GetResponse is an online marketing tool. It is mostly used for its extraordinary email marketing sequence, which successfully brings a massive customer response. GetRespose has a wide range of resources for marketers, which helps their business grow fast and efficiently.
Related articles
GetResponse landing page builder
GetResponse also has proven to customers for their (GetResoponse’s) user-friendly landing page generator. You can build a landing page from scratch by using their object collection or creating a page from their temple collection. For learning the steps of making a significant landing page, follow my lead,
GetResponse Video Tutorial on Landing Pages
Step One, Log in
Log into your GetResponse account, and go to the landing page section of your home page. The menu will take you to another feature, Manage landing page, keep following.
Step Two, create landing page

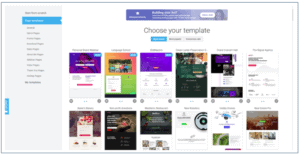
Click on the blue button named “create landing page.” You are now on the Build from Scratch feature; you can build landing pages from multiple templet collections. At the left, there is an option “All templets” you can tap on it and choose your desired templet for the landing page. The temple has multiple categories according to your preferences. You can also build a new templet from scratch; you can find the feature on top of the left menu bar. You can start with a blank page and add objects from the GetResponse collection.

Step Three, choose templet
Choose a templet by clicking on it. Enter the name of your landing page on the blue-bordered white box. The name must be related to your business, so think properly before typing it. Under the box, there are two preview options, a landing page & a thank you page. Click on the thankyou page after setting the page name. If you find the page okay, then click on the blue button “Next.” This will start loading your landing page editor.

Step Four, testing
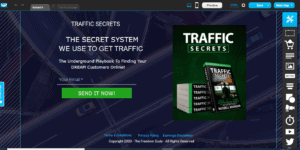
After loading, you will be in your landing page editor; you can see multiple tools for editing your page. Look on top of the window; you can see an option named “Variant A/B.” This option helps you create different variants of the home page; you can also progress tests to measure which version is best for you.
Step Five, customizing your landing page
Tap into any page of the page; you can see a few editing options appearing on your screen. You can customize background colors, font size, alignments, underline texts, and add photos from your gallery. It’s an easy customization system, tap and edits the objects of the page. You can do the same thing with the thankyou page, try to customize the thank you page dynamically, upload your logo and other details in there. Run tests with multiple variants and select the best one from here.

Step Six, editing mobile and desktop versions
You can customize the page for both mobile and computer versions. Look at the top bar; there are two signs of mobile and pc. You can select each version and add or remove objects which are better for both versions. Press the white preview button to get a final look at your customization on versions.
Step Seven, meta description
Click on the blue-bordered “HTML” menu. Add your site title and meta description of the page. You also can finish this step in the next step if you press the next step in the right corner of the page. You can add photos, thumbnails, logos in this option. You can leave the process if you don’t want to publish the page right now, press the save option. You can leave your customized page as a template. This step is only if you feel confident in editing in HTML.
Step Six Landing page Editor
Click on the blue settings button with tools on the right. You can see many editing tools for reshaping the page elements, objects and adding photos, videos, and many more things.
The first tool is the section tool; click it and select the place to add a new section.
You can add texts with the “text tool” to expand the page size if you need space.
The next one is the photo tool; it can add photos on the page, edit or replace as you want.
The button tool helps you put additional buttons on the page; you can customize the button color and other details. The editing tool also allows you to attach different sections of the page, so when your visitor clicks on the button, he can go into that particular section on the page.

GetResponse opt-in or form editor
The Form editor is one of the best creative tools in the toolbar; it can create different forms or make a separate popup form. You can place the form anywhere by using drag and drop. There are multiple options for form selection: scroll form, image form, download form, fixed bar form, and exit popup form. Please select your desired form and customize it.
Adding images or videos
Suppose you want to add graphic elements to your page. You can use the shape tool for creating various shapes.
The Countdown timer comes with a date, hour, min, sec, bar, which you can use on your page for special occasions, product sales, product launches, or discount events. Increase your urgency on your page with the timer tool.
If you want to add videos to your page, add the link on the link bar after selecting the video tool. It’s straightforward to add videos to your page with this tool. Just drag and drop it, and complete.
For adding your social media to the site, you can click on the social media tool. It has Gmail, Linked in, Twitter, and Facebook, adding options on the page.
Integrate Pay Pal Button on your landing page
There is also another integration for the payment option. You can have PayPal integration from the toolbar.
If you want to embed any unique code for your site, you can add it by clicking on the embed code tool. With this tool, you can add maps, widgets, plugins, songs, and many more things.
You can also schedule online seminars on the page, using the webinar tool. Set up your webinar account and promote or launch your product from your site.
Step Seven, setting up SEO
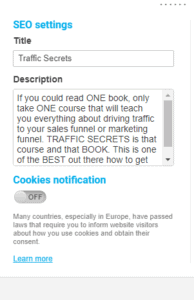
Now you are almost ready to go after customizing the landing page. Press the next step button, add your details in the SEO settings. Such as name, description, domain, or subdomain. Configure your subscription settings. Read the details thoroughly and fill up every detail. Press the publish button if you are done.

Step Eight, Final setup
GetResponse will show you a white page after your landing page goes live. You can view your page from there. You can create another landing page, view your page, or manage your live page for more customization.
GetResponse has a simple landing page creator; anyone can create a page from this page creator.
If you don’t have expertise in web designing, try GetResponse, and create your landing page.


